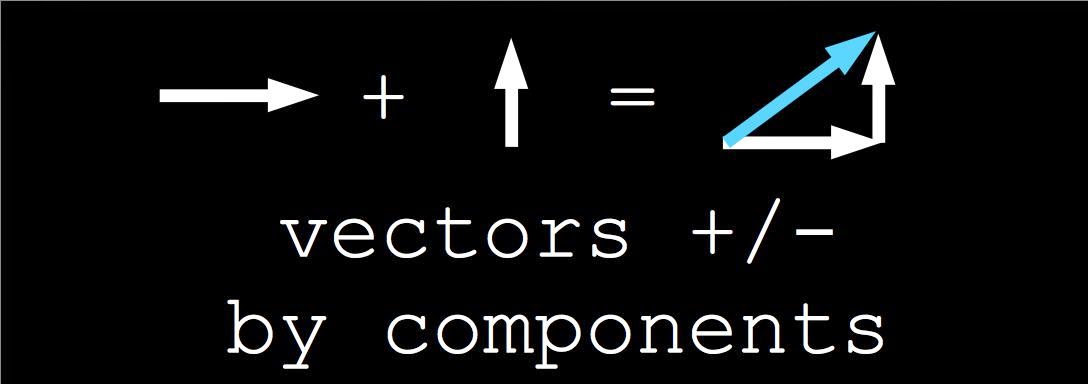
Tuesday, May 12, 2015

Episode 043: 5 Steps to Break Any Vector Into Components (in Cartesian Coordinates) AND Combine Components Back Into The Original Vector!


Download this episode (right click and save)


Breaking vectors into components will become habitual before the end of your first semester of physics. You will use it in a variety of places. A few monster examples that come to mind are calculating displacement, finding x and y components of velocity during kinematics problems, almost every force problem requires you to break the forces into components, momentum, torque, the list goes on and on. As this will permeate many waking hours of your physics student life, it would be nice to have a procedure to make the operation a little more painless. Go through these five steps each time to make the process a little more mechanical. It will increase your fluency and increase your accuracy, leaving much less room for mistakes.

1) Identify your coordinate axis and draw it on the paper. This is not always defined in the problem. If they don’t require a particular coordinate system in the problem pick what works best for you. HOT TIP: Try to select an axis that lines up with as many vectors as possible in the problem. This will leave less vectors to break into components!

2) Identify your vector and draw it on the paper. I would advise doing a separate drawing for each vector in the problem. This will avoid a lot of confusion because the drawings will get busy and very messy.

3) Identify your angle and draw it on your paper. This is VERY important. The angle matters because your sin/cos/tan change based on which side is opposite and which is adjacent. You can use whatever you’d like but be detailed with your selection!

4)Use sine and cosine relationships for component definition. This step is essentially a nested “do the 6 sohcahtoa steps” step.

5) Box your answer, you’re done!


Okay, wonderful. So we’ve broken the vector into x and y (usually) components. Wonderful, now what? Well, this is the end of the road for now. This recipe can be used in a variety of situations so we can implement it later. The question is, let’s say we’ve broken several vectors into components, all correctly and meticulously like good students. We perform some vector addition and subtraction, and have our final vector components. Now what? How do we reconstruct our final vector? This is usually what the problem will be looking for anyhow. Well, next we have a 5-step recipe for doing just that.

1) Identify the coordinate axis and draw it on the paper. Sound familiar?

2) Identify your components. These should be handy from doing many operations, or else they were probably given in the initial problem.

3) Use the pythagorean theorem to calculate magnitude. a^2 + b^2 = c^2. Solve for c. Remember that we can consider a vector to be a hypotenuse of a right triangle?

4) Use arctangent to calculate angle, i.e. direction. Remember toa? We’re certainly given the opposite and adjacent side if we’re calculating the hypotenuse, so use those sides to calculate angle. Don’t forget to remember if you are in radians or degrees mode!

5) Box your answer, you’re done!

That’s really all there is to it. As before, to gain fluency, it will be useful to run through some examples. The next episodes will go through 4 detailed examples of doing both of these operations.

Wednesday, May 6, 2015

Episode 042: 5 Critical Vector Properties for Components and the Importance of Coordinate Systems on Vector Operations


Download this episode (right click and save)


When considering how to introduce vectors as an introduction to vector components, I thought that it would be critical to dig into all the nitty gritty of vectors, dot products, cross products, unit vectors, which operations were commutative, etc. I decided that breaking vectors into components is a very useful operation that can be done in very few steps, with a relatively little amount of knowledge. The useful crux here is that you really don't need to have a depth of knowledge to understand what is going on here, be really good at breaking a vector into components, and using this technique all over your physics courses. I'm not saying that the other depth-stuff isn't important, but it's not critical to get the job done here.

1) Vectors can be imagined as an arrow of certain length. The length gives the magnitude, and the orientation of the arrow gives the direction.

2) Vectors slide!- Any vector of the same magnitude and direction is the same as any other in the coordinate system. You can slide vectors anywhere you'd like in the coordinate system and have the exact same properties! E.g. displacement. It doesn't matter where in the world you walk 5 miles, you still walked 5 miles.

3) Vectors can be represented as a single coordinate, [x,y,z]- Because vectors can slide, they can be described as a single point in the coordinate system, with the other point assumed to be the origin.

4) Since vectors can be described in terms of a coordinate, say, [x,y], the vector can be thought of as a hypotenuse, whose legs are the vector components which align with the x and y axis.

5) Vectors can add and subtract by adding and subtracting like components. Many applications, such as displacement, force, actually any vector fare, you will have to add or subtract vectors. The easiest way to do this is to add and subtract the x, y, and z components of each, and then recombine the resulting vector.

Do you see how all of the effort and emphasis on being fluent with sohcahtoa is going to come in handy? Those 6 steps are going to get embedded into a single step in the breaking vectors into components step-by-step. So, we should be applying our newly found sohcahtoa knowledge in no time!

Tuesday, April 28, 2015

Episode 041: Vector Vocabulary- 9 Must Know Terms for using Vectors!


Download this episode (right click and save)


The one where your host gets you privy to some vector terms and vocab.

1) Scalar- A quantity which has magnitude only, i.e. no direction. Examples: Mass, Charge.

2) Vector- A quantity which has both magnitude and direction. Vectors are usually specified as having their "tail" at the origin, and then their "tip" or terminal point is given as a coordinate, identifying both the magnitude and direction. Ex. A force [2,1] acts on a body. We assume the vector starts at the origin and points to point [2,1]. Using some trig, and the pythagorean theorem, we are able to calculate both the magnitude and direction! Usually drawn as a ray, or an arrow. The arrow point is referred to as the "tip" and the line "end" is referred to as the "tail"

3) Initial Point- The "beginning point" or tail end of the vector.

4) Terminal Point- The end point or tip of the vector. This usually denotes the direction of the vector.

5) Direction angle- Angle which describes the direction of the magnitude of the vector.

6) Component- The amount of a vector which is aligned with a particular direction, usually a coordinate axis. A vector can be described by each of its components in any coordinate system.

7) Dot Product (Scalar Product)- Operation with two vectors which returns a single scalar value. This is useful when relating a scalar value with two vector quantities. E.g.: W = F(dot)d. Work is a scalar value which is the dot product of a force vector and a position vector.

8) Cross Product (Vector Product)- Operation with two or more vectors which returns a vector value. This is useful when relating vector quantities in terms of other vector quantities. E.g. torque = force (cross) radius vector. Torque is a vector quantity.

9) Unit Vector- Vector of magnitude 1.


I think at this point we have established enough jargon that we'll be able to speak intelligently about vectors. Stay tuned next episode for Vector properties!

Monday, April 27, 2015

Episode 040: The Northern Lights a.k.a. The Aurora Borealis!


Download this episode (right click and save)


I mentioned last episode that I was up in Alaska for some vacationing. It would be remiss of me to travel up to the Great White North and not mention the aurora borealis, a.k.a. the northern lights. Using a handy app (click here for more info), I checked for the lights every night of the journey. Unfortunately, they were either inactive, or they were active and it was cloudy out.

The only chance I actually did have to see them was on the plane ride up. They were really something. They looked like green S's stretched across the sky. But what are they really?

The aurora is caused by charged particles entering the atmosphere. This ionization gives off color, which then looks beautiful to those of us standing on the ground. Typical colors are red, purple, green, and blue. If the particles collide and ionize oxygen particles, the aurora is typically green or orangish-red. If the particles collide and ionize nitrogen, the aurora will glow blue or red.

So alright, we now know that the aurora is caused by charged particles, but where do they come from? Generally, from the Sun. Coronal Mass Ejections (CMEs) are these monster amounts of plasma that are ejected due to instabilities in the sun, and make their way to earth. Plasma has no shortage of ions, and solar winds blow the ions into our atmosphere. It usually happens somewhat predictably. Newspapers and now apps can tell you when there is a good forecast to catch the lights. Generally, they happen way up North, as far as America is concerned Northern Canada and Alaska. This is because the poles are pointed closest to the sun at various times of the year. Because the particles entering the atmosphere are charged, the lights ultimately try to align with the earth's magnetic field.

The word aurora borealis literally means northern lights. My research indicates that it is an amalgam of aurora from the Latin, meaning dawn, and borealis coming from the Greek meaning wind. I have also read that there exists a word borealis in Latin meaning northern. However, I will defer to NASA for the final word:

"In 1619 A.D., Galileo Galilei coined the term "aurora borealis" after Aurora, the Roman goddess of morning. He had the misconception that the auroras he saw were due to sunlight reflecting from the atmosphere." (Source here)

Question is: if there are northern lights, are there also southern lights? Answer: yes! The southern lights are referred to as aurora australis, meaning southern lights.

There is a region where the lights are on display. This is called an Auroral Oval. The location and size of this oval varies from night to night. Sometimes during geomagnetic storms, the oval will expand down to lower altitudes. I remember as a young child, maybe 5-7 years old, my father caught them out in Buffalo, NY, on a cold winter night. He called us outside and I had one of my first wondrous encounters with the strange physical world. My recollection is that they were red. It was immensely beautiful and the event was burned into my brain. I remember him saying that they usually happen way up north but sometimes we're able to see them down this low south. I've never seen them this low since. So, I was particularly excited when I realized I would be traveling right into their neck of the woods. Unfortunately I grabbed exactly 0 good pictures of them.

However, I did solicit a few pictures from an Alaskan Native I was visiting, to include for your enjoyment below. They are a marvelous phenomenon and a great example of the beauty possible in our universe.

All photos: Ariana Fremgen

Wednesday, April 22, 2015

Episode 039: sohcahtoa wrap-up and app release party!


Download this episode (right click and save)


The day has finally arrived! The apple powers that be have finally gave the green light. I am very excited to unveil the new pwn mathematics: sohcahtoa app for all my iTunes/iPhone listeners. I feel that this app has everything I'd look for in a sohcahtoa training tool. Allow me to take you for a walk through the various features of the app, and allow it to serve as a door-closing wrap up for the sohcahtoa topic that we've spent so much time (and episodes) covering.

The first stop on the sohcahtoa tour is the answer to the question: what is sohcahtoa? Sohcahtoa is a mnemonic device that helps you to remember the relationship between trigonometric functions of angles and the ratio of sides of a right triangle. Each letter either represents sin/cos/tan, or the sides adj/opp/hyp. There are three sections soh/cah/toa which all follow the same pattern: trig function = side/side. Example: soh represents sin = opp/hyp. If you're brand new, try to do the same for cah and toa.

Next, we need to understand which sides represent which on a right triangle. The hypotenuse is always the side which does not form the right angle on the triangle. It looks like the diagonal of a rectangle or square. The opposite and adjacent sides vary depending on which angle you are interested in. The adjacent side is always the side which forms the angle along with the hypotenuse. The opposite side is always "the other side", aka as the only side which does not form the angle of interest. As the angle of interest changes, the opposite and adjacent sides will switch.

Equipped with this information, we can now outline 6 steps to quickly and efficiently solve any problem where sohcahtoa can be applied:

1) Identify the right angle in your triangle. This confirms that you will be able to use the sohcahtoa rule.

2) Identify your angle of interest. This will change which sides are opposite and adjacent.

3) Identify your opposite and adjacent legs of the triangle.

4) Using the sohcahtoa rule, set up a relationship using sin/cos/tan, the angle, and two of the adjacent/opposite/hypotenuse sides.

5) Solve the equation for your desired variable.

6) Box your answer, you're done!

The best way to understand these steps is to put them in action. I encourage you to check out Episode 35, Episode 36, and Episode 37 where we roll through these examples in great detail.

To me, the best way to reinforce concepts is to do flash cards. Included in the app is a flash card section which rolls through the sohcahtoa ratios, as well as adjacent, opposite, and hypotenuse identification. Coming up next is vectors and component calculation where we will see the sohcahtoa application as a practical application. You will use this a zillion times in first year physics courses, so brush up and make sure you can do it in your sleep! The app is designed to be a quick review for test time, as well as a review tool to keep yourself in the zone at various points of convenient downtime, like a bus ride or waiting in line. Always use times like these to do some review. It will help your fluency immeasurably.

Monday, April 13, 2015

Episode 038: 7 Test-Bomb Recovery Tips!


Download this episode (right click and save)


Quote of the day: "Turn a seeming disadvantage into an advantage" -Robert Fripp

It's happened to all of us, sooner or later. The big bomb. If it hasn't gotten you yet, one day it will. The question is, will you let it ruin your semester? Included below are some break-the-glass emergency tips to help you bail the water out of the sinking boat in the event that a cannon ball of a terrible test comes your way.

0) This course has to be your focus for the rest of the semester/year- You have to tighten up for the rest of the semester. It's possible to bounce back from one bombed test. It's very difficult if not impossible to bounce back from 2.

1) Check that you actually did terrible on the test- Check the class average and the high/low scores on the test. Physics classes are not like other subjects where 90 is the bench mark for doing well. Sometimes a 55 is the highest score in the class!

2) Don't beat yourself up- Dust yourself off, get up and keep going. Don't give up. You don't have anything to gain from going down the spiral of self-deprecation.

3) Use this failure as inspiration- Sometimes a bombed test is the wake up call you need. Use this as a no-room-for-failure motivation if you're feeling lazy about continuing on with the course.

4) Identify points of failure- Did you party the night before? Were you just struggling with a particular topic? Are you weak on the fundamentals required for the course?

5) Become a permanent fixture of office hours and any review sessions- Go even when you don't think you need to. You never know what you're going to pick up. Putting in face time also shows your professors that you are taking things seriously, and may allow the pendulum to swing your way come final grade time.

6) Gear up for the Final- Usually when you do terrible on something it burns itself deeper into your memory than the things you did well on. If these questions crop up on the final, you'll remember them clearly so if you can use this experience to learn from those mistakes, they'll be your strongest points on the final. The final has to be your focus for the rest of the semester. It is usually weighted more, and acing your final is the key to wiping this besmirch away good!

7) Every point is precious now- Anything you can do to curry favor is going to make the difference. Make sure your homeworks are all 100%. Make sure they are neat, and perfect, and a joy to grade. Make sure any opportunity for extra credit is maximized. Make sure you are prepared for any quizzes. There is now little room for leaking points.

Thursday, April 9, 2015

Episode 037: sohcahtoa example #3: THE OPPOSITE SIDE!


Download this episode (right click and save)


Coming to the third example, we should have gained much more comfort and fluency with the process. While we're still doing a totally different problem, this should feel a lot like variations on a theme, which it is. You should begin to feel the method and see where the problem is going before you get there. Let's dive in.

Q: Calculate the opposite length based on the picture below.

1) Identify the right angle in your triangle. This confirms that you will be able to use the sohcahtoa rule.

See the square? Right triangle. Check.

2) Identify your angle of interest. This will change which sides are opposite and adjacent.

This is now the other angle compared with the last two problems. Let's see if this changes anything. Do you know yet?

3) Identify your opposite and adjacent legs of the triangle.

So a slight deviation from the past problems. Now we have the opposite and adjacent sides reversed. Notice how it can change from problem to problem? That's why we mark the sides. Don't forget to do yourself that service and avoid sloppy mistakes.

4) Using the sohcahtoa rule, set up a relationship using sin/cos/tan, the angle, and two of the adjacent/opposite/hypotenuse sides.

In this example, we actually know the angle, 53.14 DEGREES. When we go typing this in our calculator, remember to put the thing in degrees mode, or everything will be wrong. And, since we know the hypotenuse and angle, and are looking for OPPOSITE, we'll use sine, aka sin[theta] = opp/hyp = opp/5.

5) Solve the equation for your desired variable.

Multiply each side by 5 and we're done. The opposite side is 4. Big surprise?

6) Box your answer, you're done!

We're done! Is it going faster now? My comments have receded more and more through the examples. You should feel a lot more comfortable at this point. If there's anything confusing at this point, try going back through episode 35 and 36 again, as well as this past example. The more you go through it, the more you will absorb.